Setup GuideBuilding Your Vault
Follow these steps to install CloudChute, connect your storage provider, and establish your encrypted backup environment.
Step 1 Install and Launch

Drag the CloudChute icon to your /Applications folder and launch the app. It will appear in your macOS Menu Bar.
Step 2 Connect Storage
Select your provider. CloudChute only has access to its own dedicated folder, so it cannot see the rest of your cloud storage.
| Provider | Security Method | Vault Location |
|---|---|---|
| Google Drive | Restricted Scope | Hidden appDataFolder |
| Dropbox | App Folder Scoping | /Apps/CloudChute |
| Box | Token Downscoping | /CloudChute (Root) |
Step 3 Authorisation
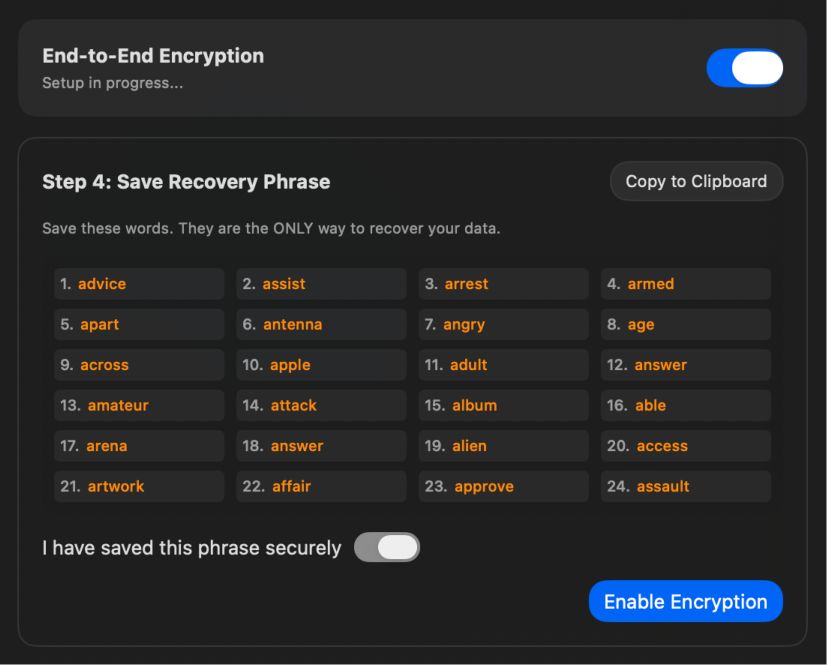
Step 4 Zero-Knowledge Encryption
Before your first backup, decide if you require End-to-End Encryption (E2EE). If enabled, files are encrypted with AES-256 on your Mac hardware before being sent to the cloud.
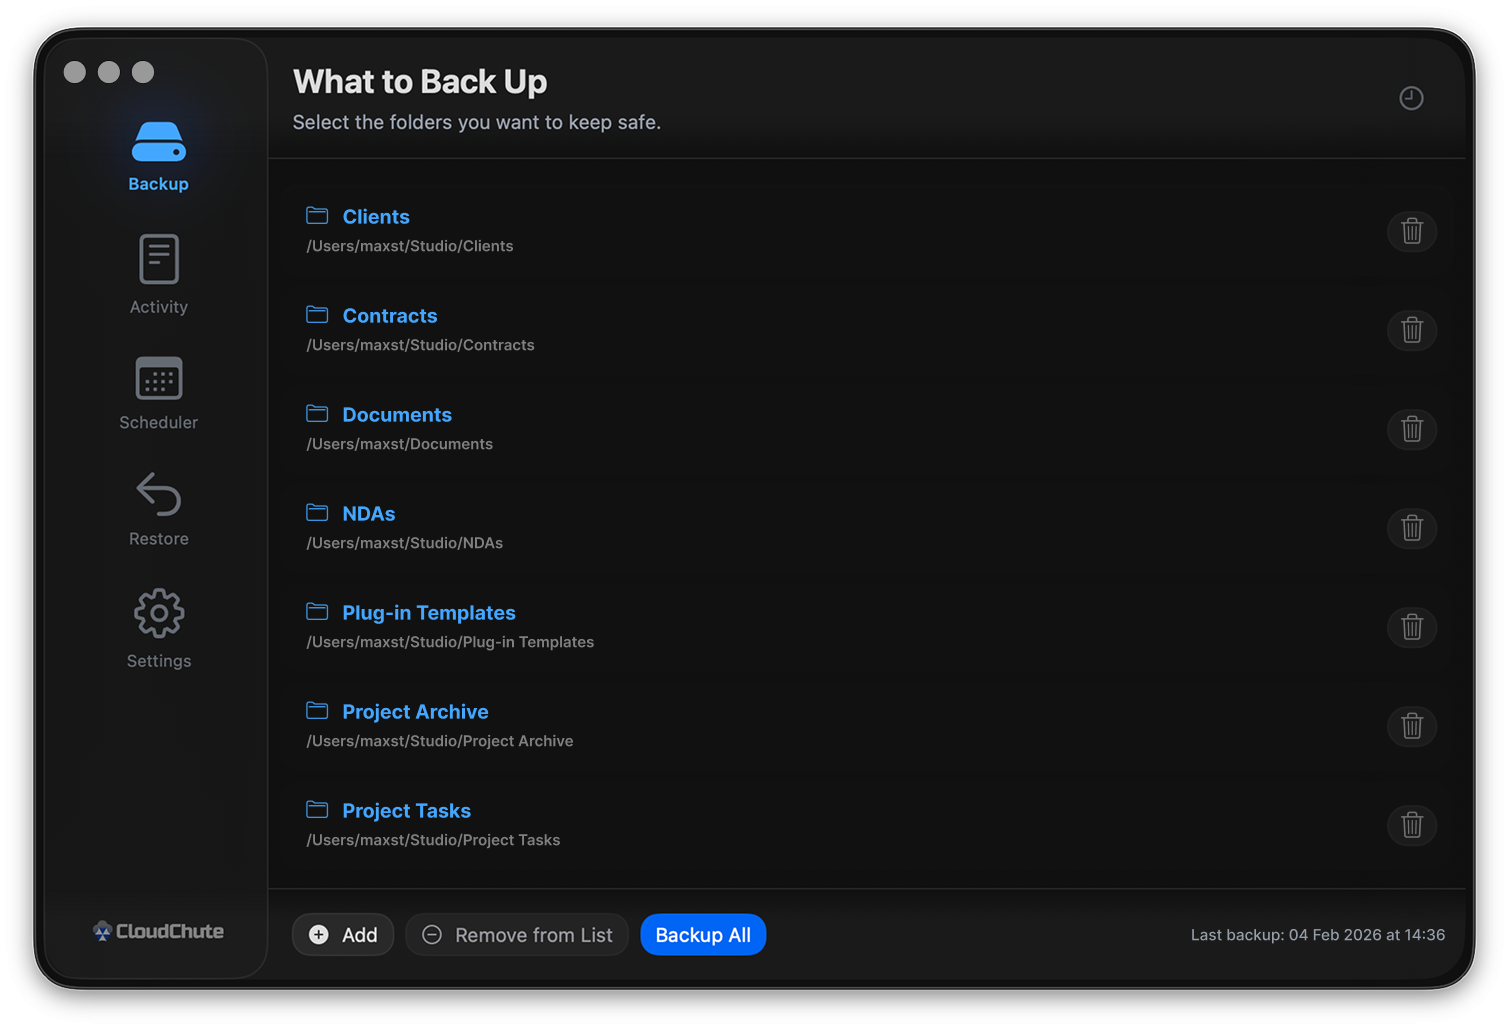
Step 5 Curating Your Vault
Technical Specifications
| Architecture | Native Swift. Optimised for Apple Silicon (M1-M4) and Intel. |
|---|---|
| Security | AES-256 GCM (Local), OAuth 2.0 with PKCE. |
| Privacy | Zero Telemetry. Direct Mac-to-Cloud data tunneling. |
| Network | Adjustable concurrency limits and exponential backoff retries. |
For more technical details, see our Technical Specifications page.
Why "One-Way"?
CloudChute operates as a true archive, not a sync tool. It replicates your data to the vault, but the vault never alters your local files. This one-way architecture protects your data from accidental deletions or sync conflicts common in standard cloud drives.
Environment Ready
 Authorisation: Scoped permissions granted to provider.
- Privacy: E2EE configured and Recovery Key secured.
- Vault: Folders nominated and initial backup complete.