
Back up your Mac to Amazon S3
CloudChute keeps your backup separate from the files on your Mac, and can encrypt files before upload. This guide walks you through creating an S3 bucket, configuring the required permissions, and connecting it to CloudChute.
Step 1 — Create your S3 bucket
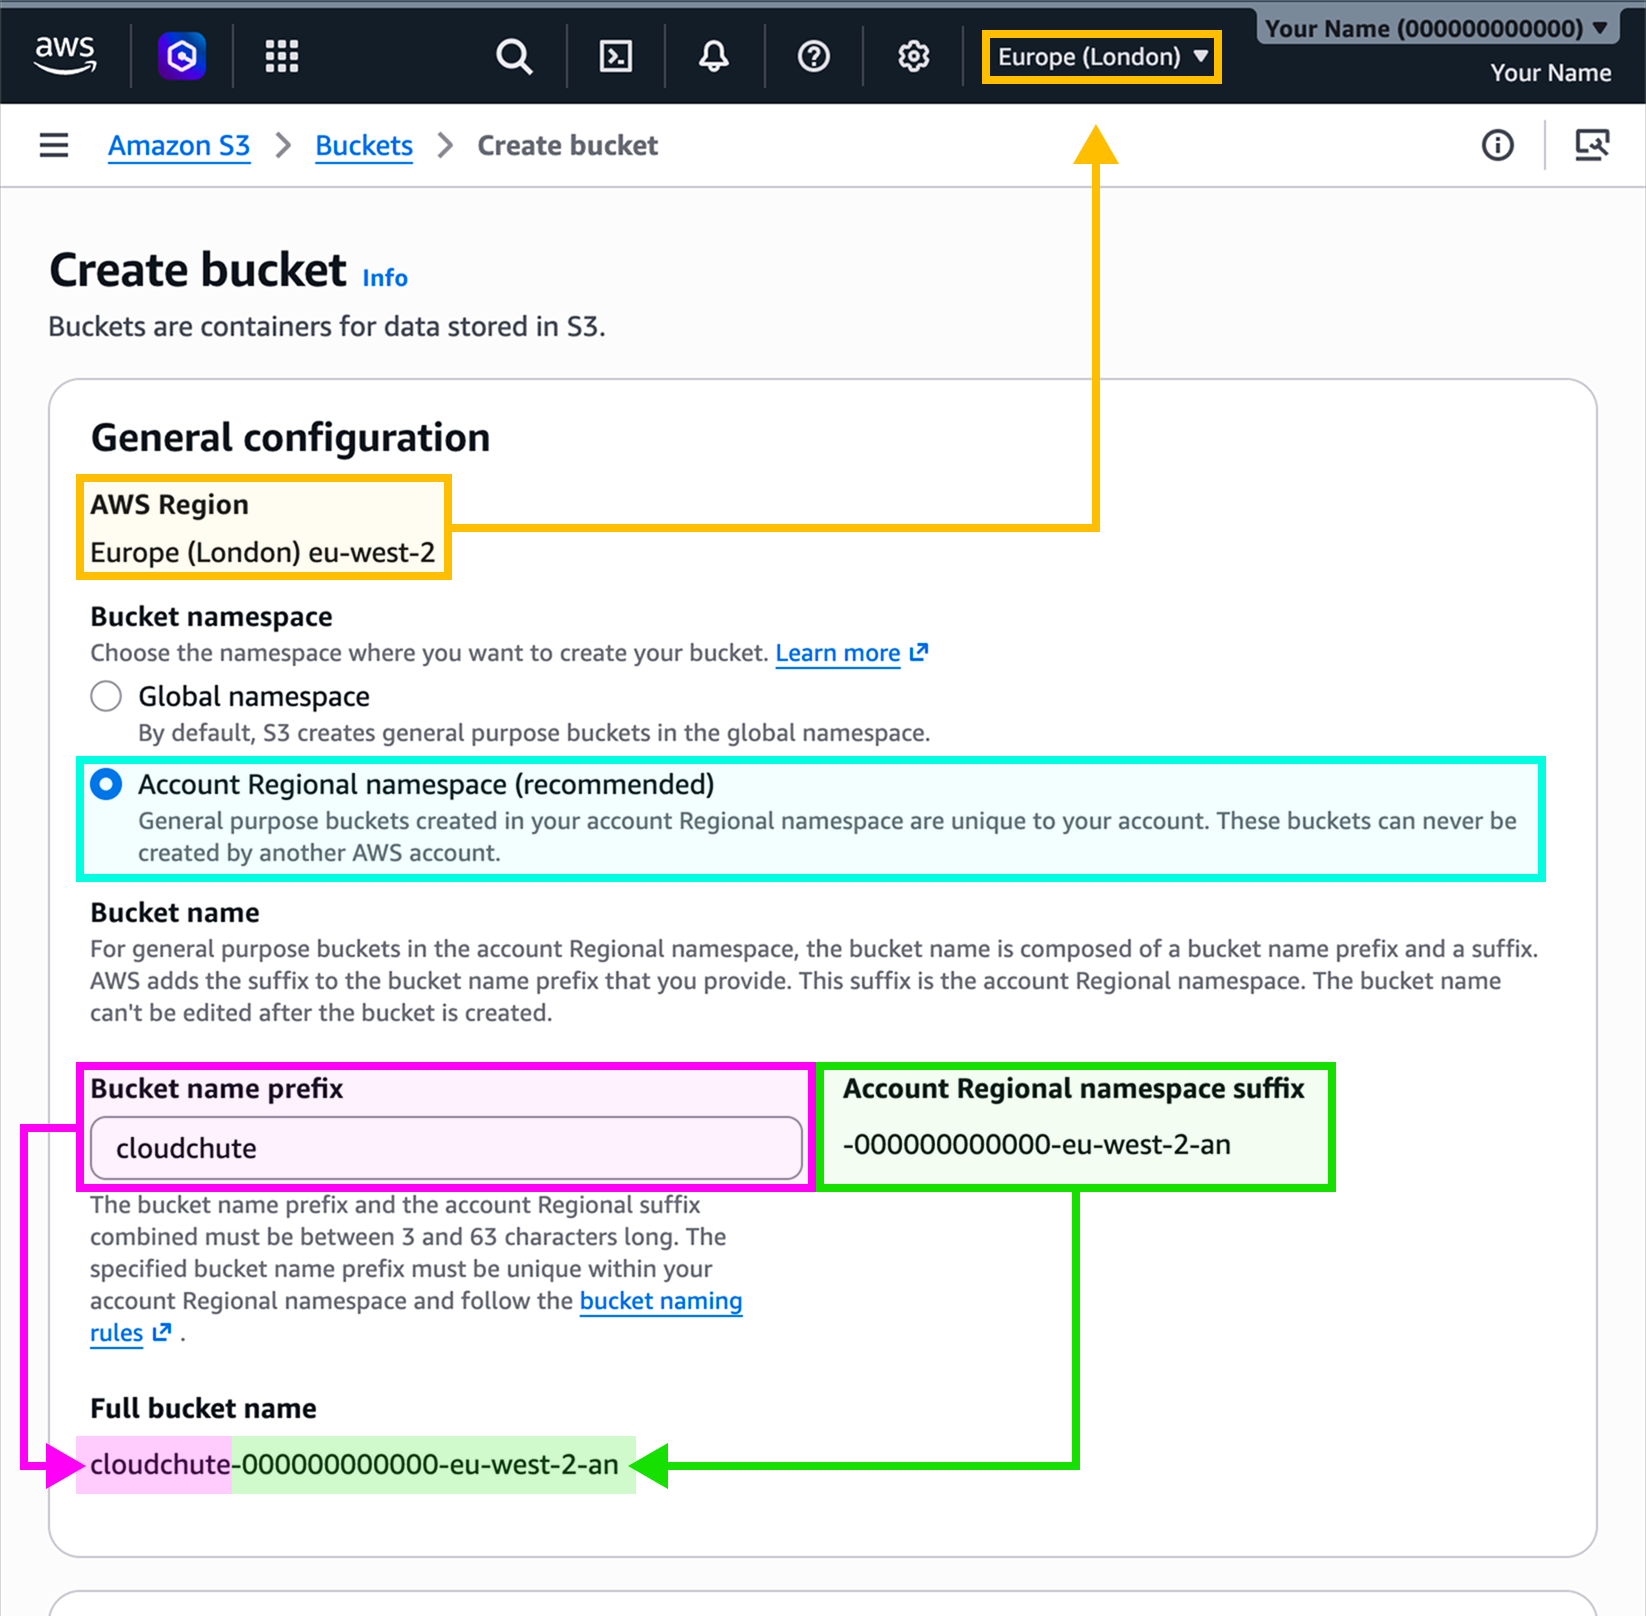
Set these options
| Setting | Choose |
|---|---|
| Region | Your preferred region |
| Account Regional namespace | Enabled |
| Object Ownership | ACLs disabled |
| Block Public Access | On |
| Bucket Versioning | On |
| Encryption | SSE-S3 |
Then choose Create bucket.
Important: Copy the full bucket name, including the suffix AWS adds, such as cloudchute-000000000000-eu-west-2-an. Copy the Region code too, such as eu-west-2. You'll enter both in CloudChute App.
Step 2: Create an IAM user
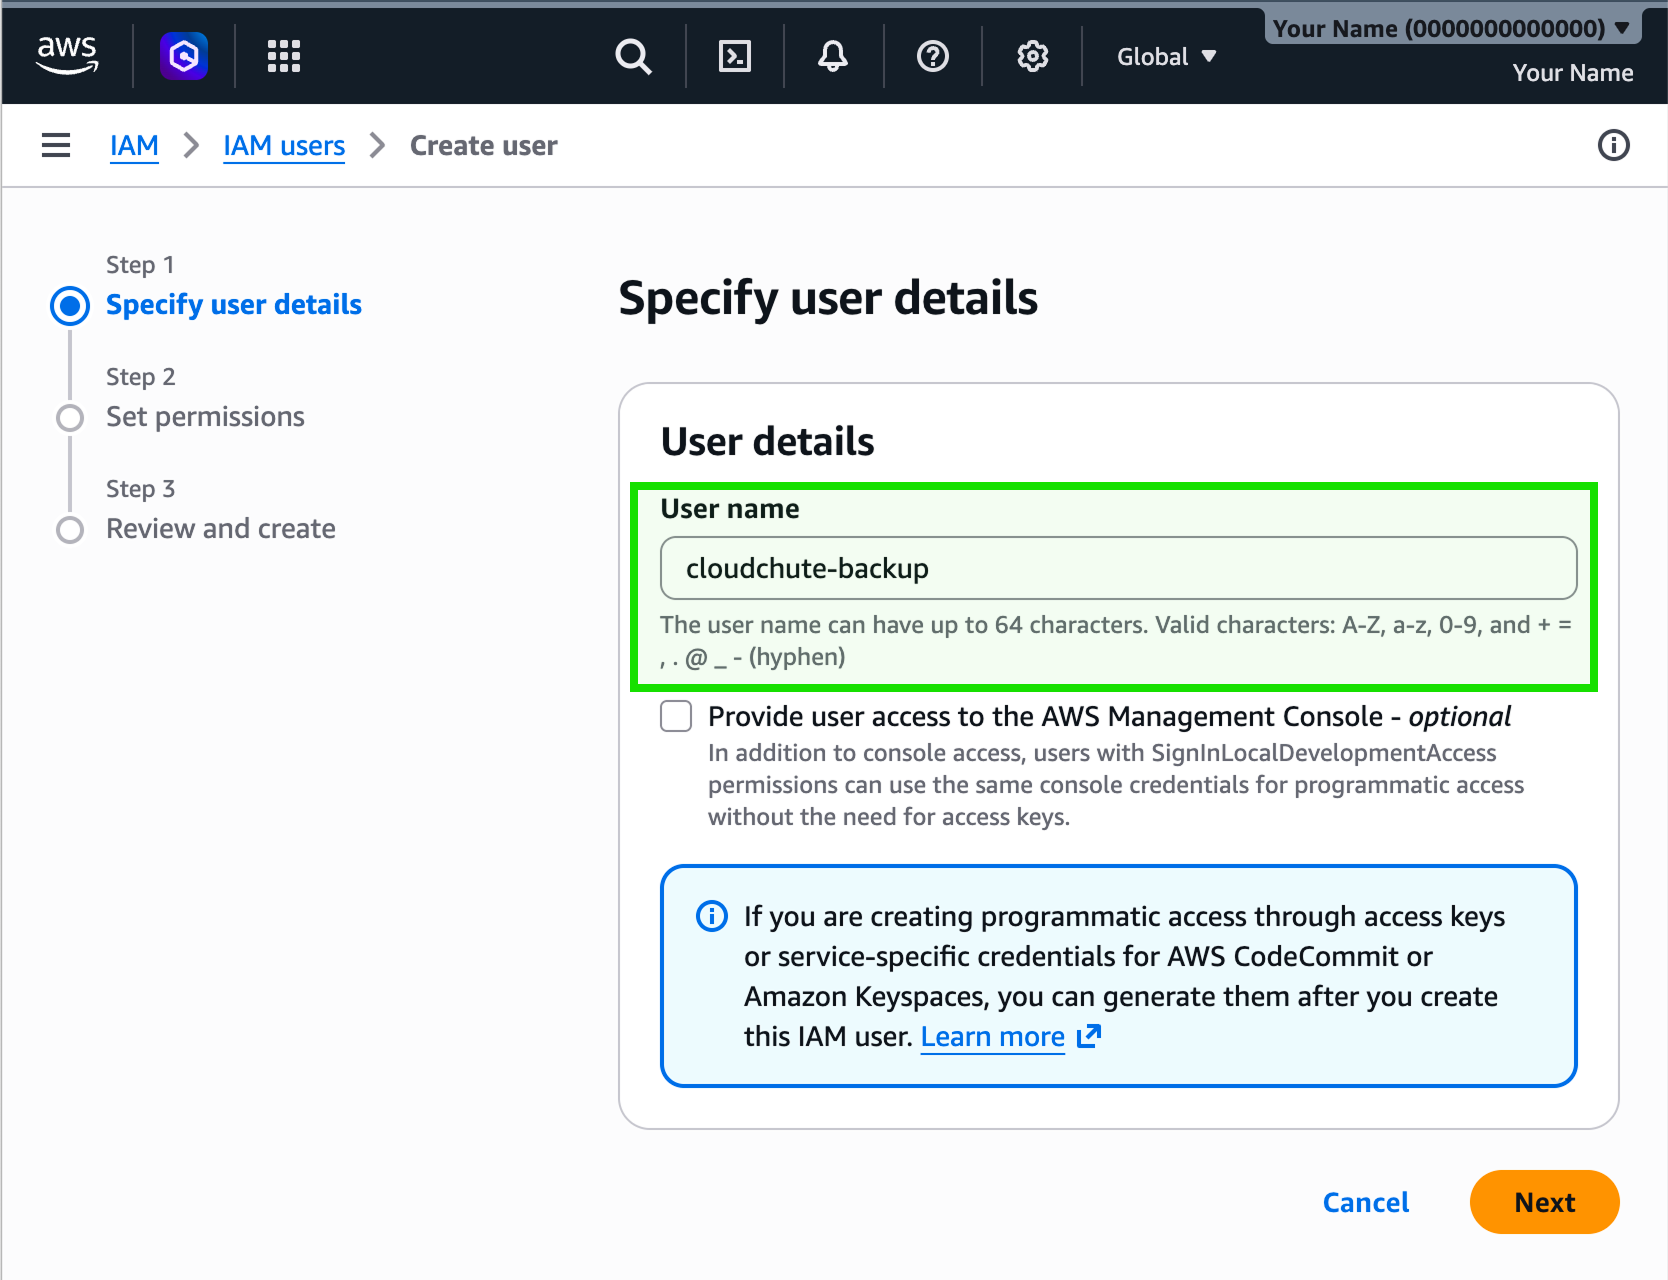
Enter a user name such as cloudchute-backup, and leave Provide user access to the AWS Management Console unchecked. CloudChute only needs an access key, which you'll create later.
Then choose Next. Don't add permissions yet. Choose Next again, then Create user.
Step 3: Create a policy for the S3 bucket
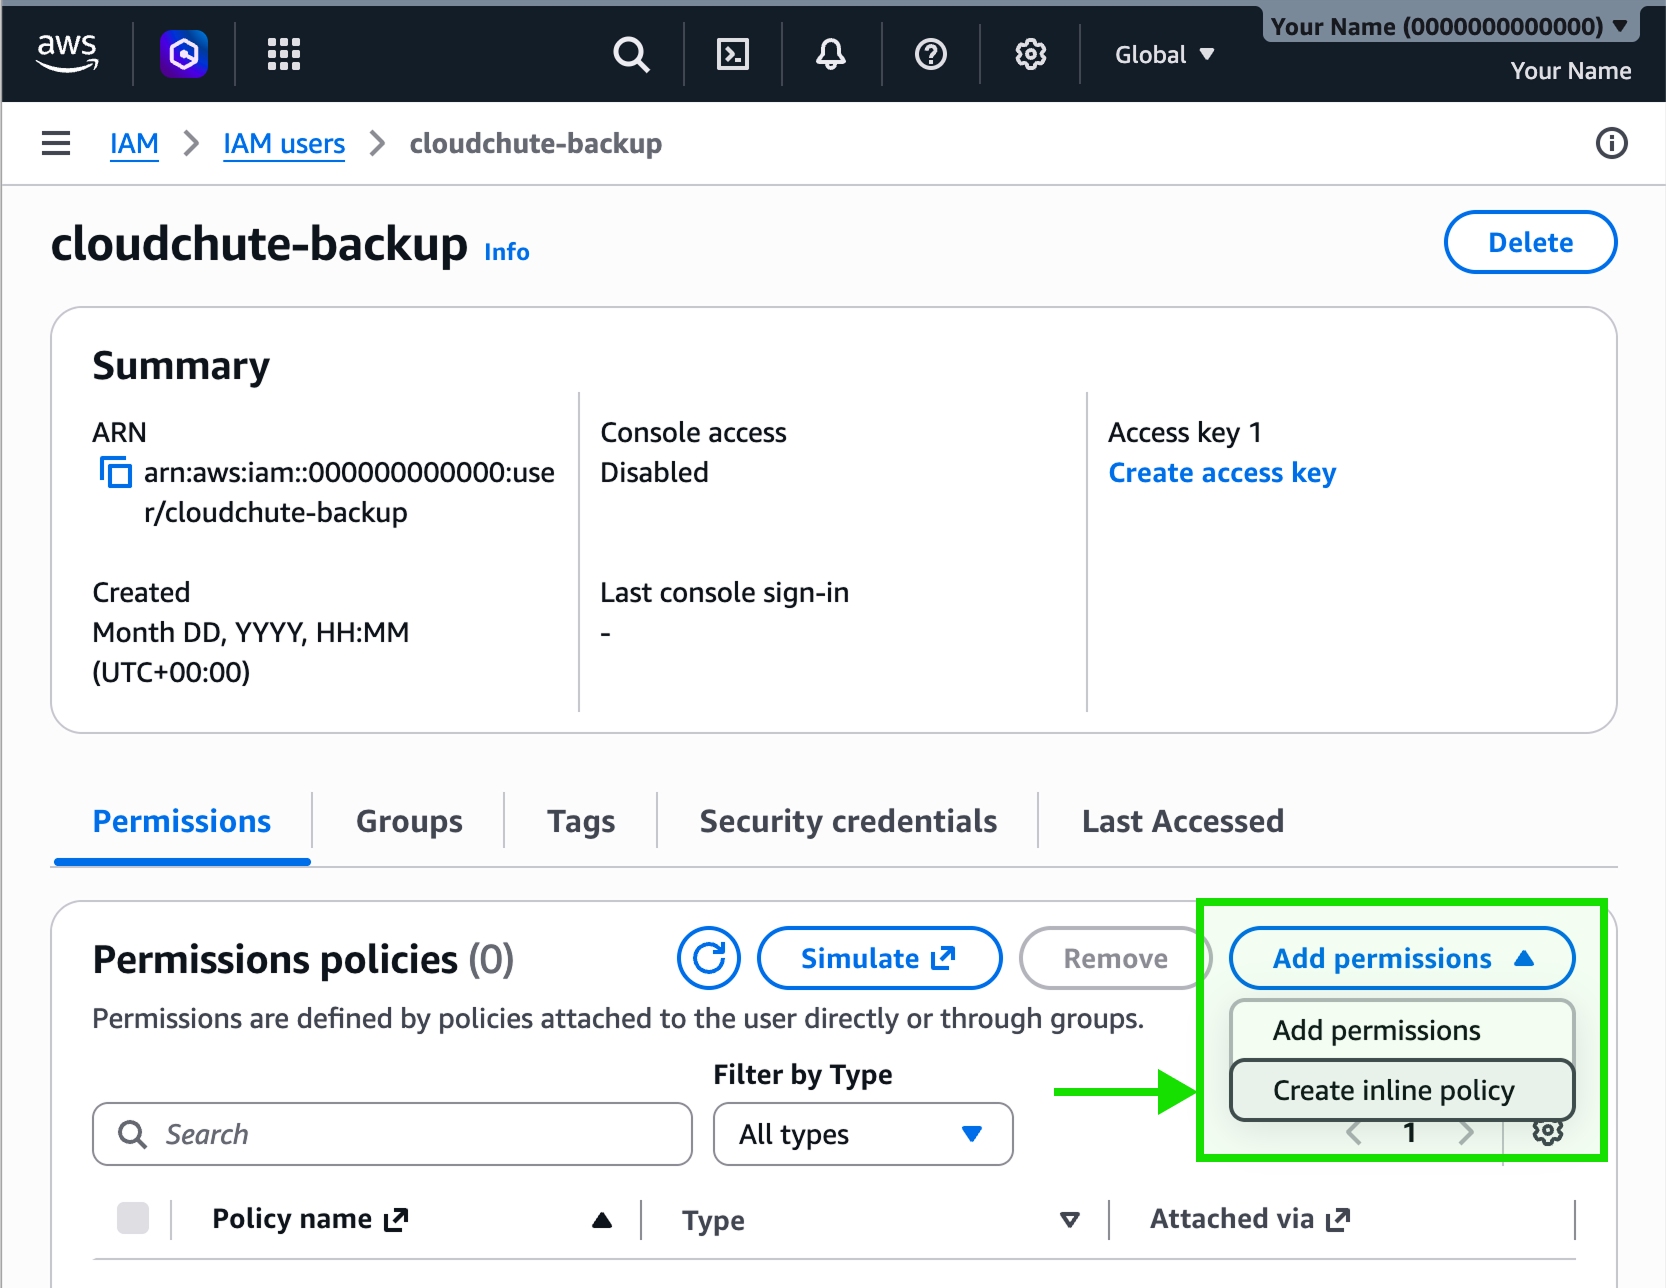
Open the cloudchute-backup user. On Permissions, choose Add permissions, then Create inline policy.
Copy this policy.
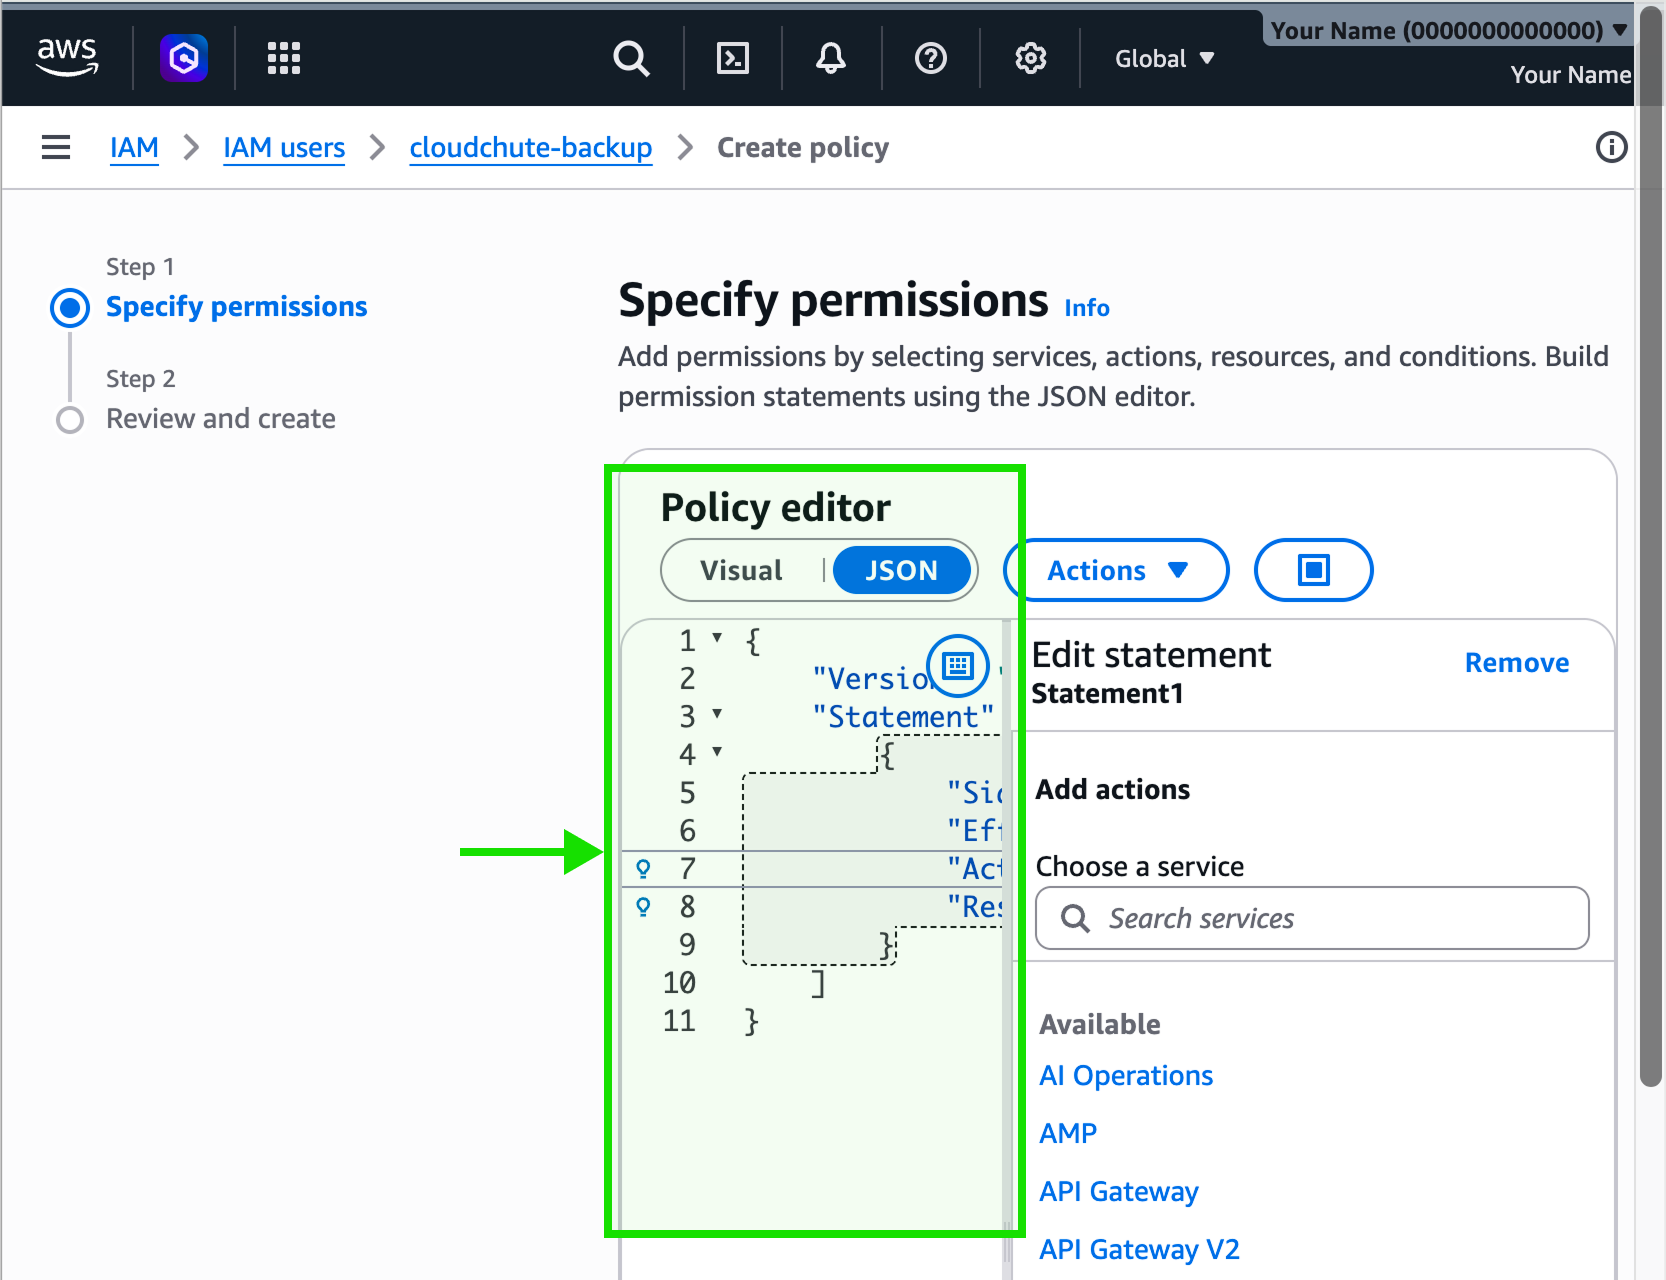
In the policy editor, choose JSON and paste it. Replace every FULL_BUCKET_NAME with your full bucket name, such as cloudchute-000000000000-eu-west-2-an. This only allows access to the .cloudchute/ prefix.
Then choose Next, name the policy, and choose Create policy.
Step 4: Create an access key
On the cloudchute-backup user, open Security credentials. Choose Create access key.
Select Application running outside AWS, confirm you want to proceed, then choose Next.
Set Description tag value to Access key for CloudChute, then choose Create access key.
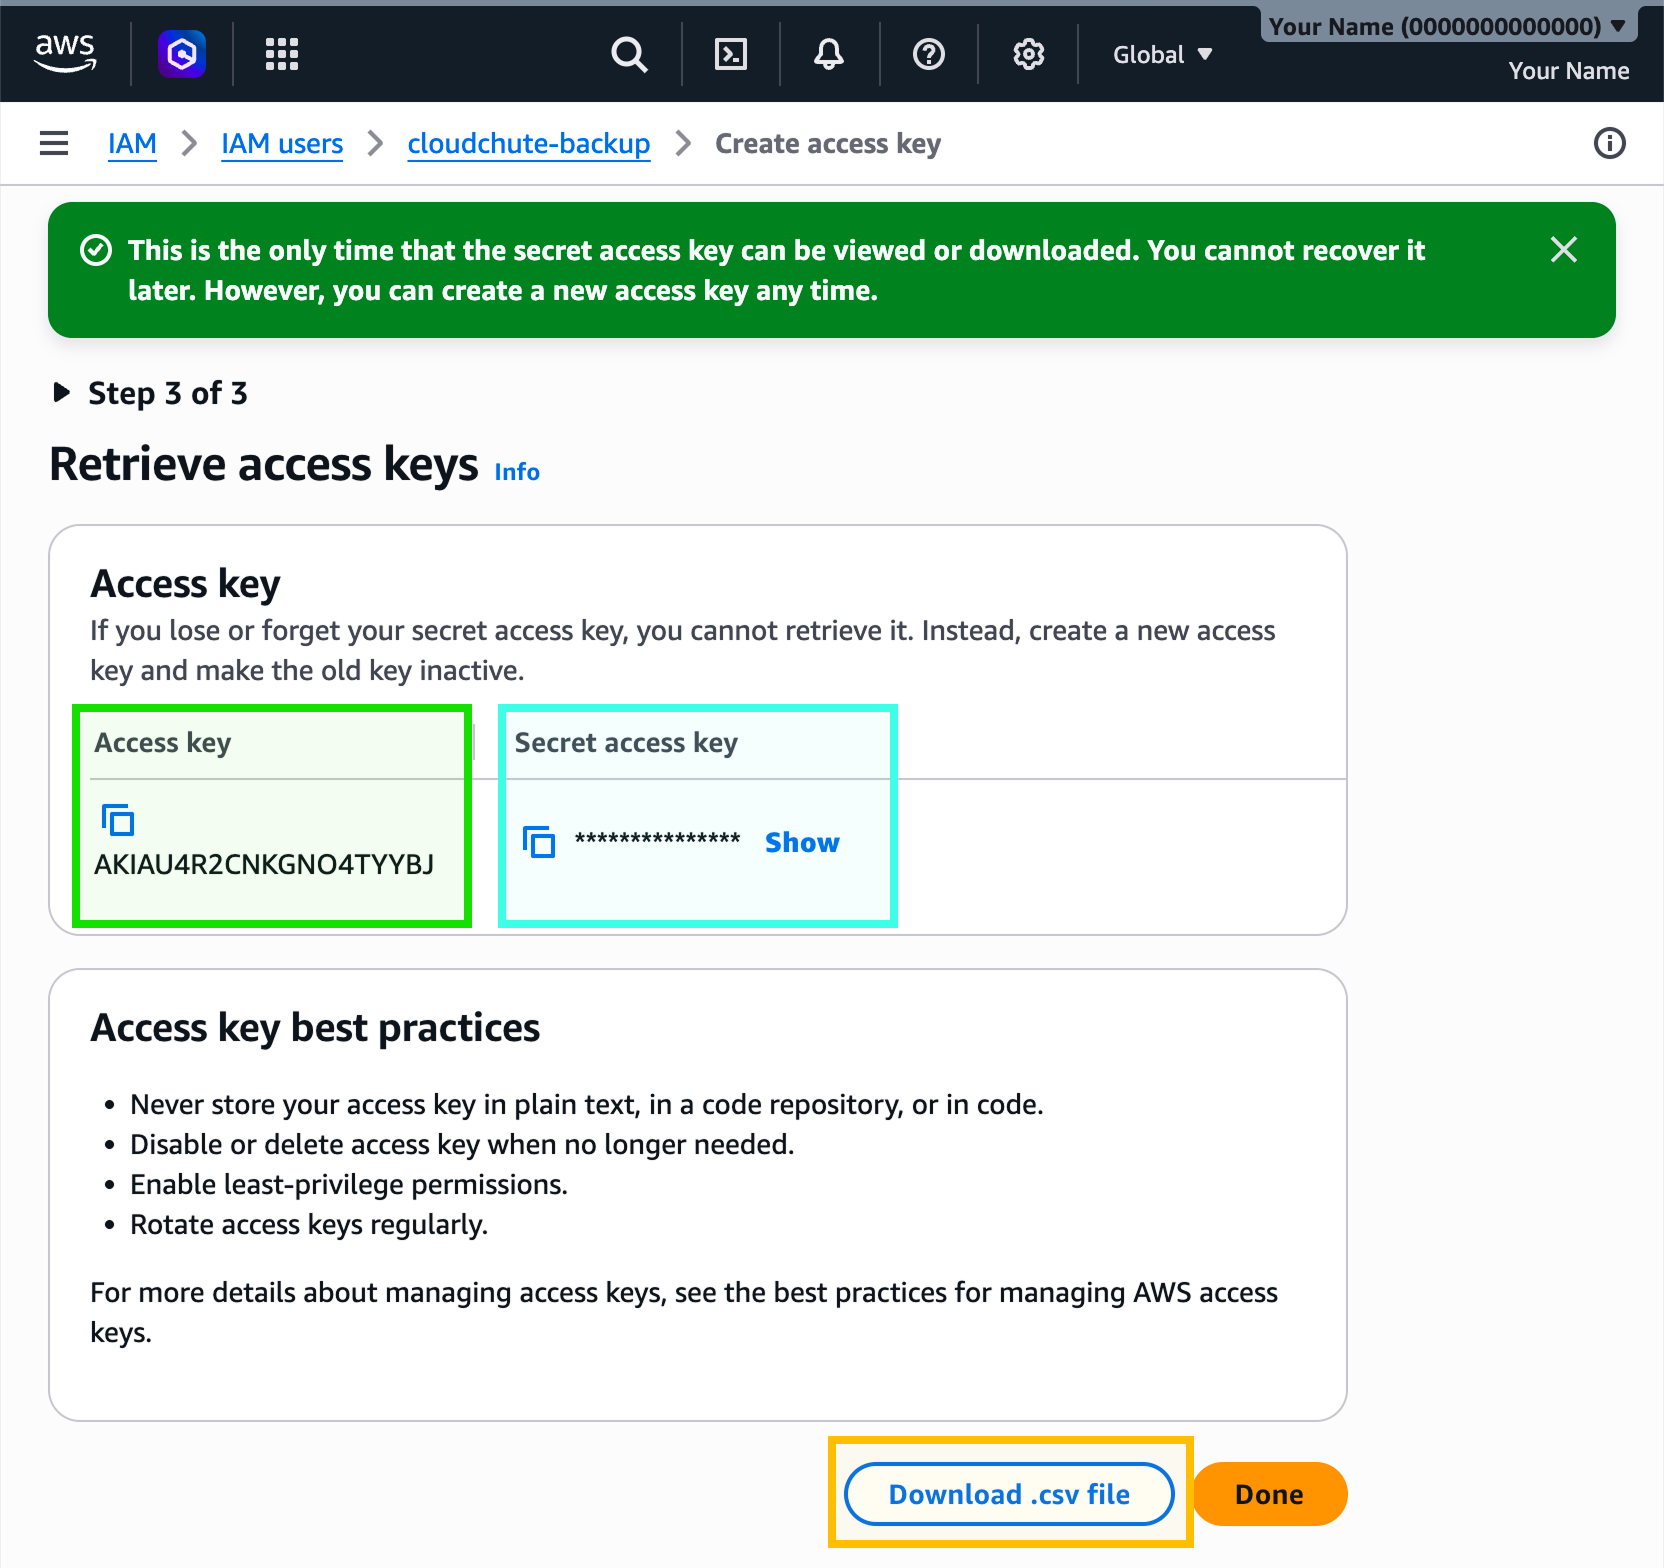
Copy the Access key and Secret access key, or choose Download .csv file.
Important: AWS shows the secret access key only once. The Access key is the Access Key ID you'll enter in CloudChute. Store both values safely.
Step 5: Connect CloudChute

In CloudChute, open Settings. Set Provider to Amazon S3.
Enter the Subscription email you used to buy CloudChute, then choose Send code. Enter the Code from the email. Mac App Store subscribers can use any valid email address.
Enter the Access Key ID and Secret Access Key from Step 4. Set Region to your Region code, such as eu-west-2, and Bucket to your full bucket name, such as cloudchute-000000000000-eu-west-2-an. Leave Endpoint empty.
Then choose Connect.
CloudChute is connected to your bucket
In the app, choose the folders to back up. CloudChute copies them to S3 and leaves that copy alone. When the first backup finishes, leave the app running. Earlier versions stay available if you need to restore a file.